Advanced Interactive Design - Final Project: Completed Thematic Interactive Website
14.06.2024 - 05.08.2023 / Week 9 - Week 16
Lim Rui Ying / 0358986Advanced Interactive Design / Bachelor of Design (Hons) in Creative Media
Final Project: Completed Thematic Interactive Website
INSTRUCTIONS
FINAL PROJECT: Thematic Interactive Website
In the final project, we need to refine the prototype and develop it into a
fully functional interactive website using Adobe Animate.
Task requirements:
- Publish files and folders (HTML, CSS, Javascript, etc)
- Upload the published files and folders to Netlify
- Video presentation and walkthrough of your project
Process
I began working on my website, page by page, based on the techniques Mr Razif
taught us during tutorial classes. My website features interactive elements
and animations including hover effects, endless horizontal scrolling text,
custom cursors and page transitions. The development process was tedious and
challenging which required extensive testing and debugging.
The main tools I utilised in my project were tweening and masking. By applying
easings such as cubic ease-out and ease-in, I was able to create smooth
animations. Besides, I integrated GSAP into my website, using its
functionalities to implement specific hover animations with scripts.
Most of the interactions are implemented based on my Figma prototype, but I
did make some changes when developing the website in Adobe Animate.
1) Loading Page
On the Loading page, I maintained the design I planned in my prototype but
added a "START" button that appears once the loading process is complete. To
develop the loading animations, I created nested movie clips to implement the
looping rotating vinyl and the loading progress bar. Clicking the "START"
button navigates to the Landing page.

|
|
Fig. 1.0 Loading page timeline |
Loading Page
2) Landing Page
When developing the Landing page, I faced problems with the album's hover
animations. Initially, I applied the mouse over and mouse out functions to the
album, but moving my mouse within the album kept triggering the mouse over
animation. After several attempts to resolve this and seeking assistance from
ChatGPT, I successfully implemented the hover animation using if-else if
statements and GSAP. This approach creates a smoother and more controlled
interaction for the album.
Album hover animation issue
 |
| Fig. 2.1 Scripts for album hover animation (GSAP & if-else if statement) |
Album hover animation fixed
Custom cursor
After solving the album hover animation, I focused on the “LISTEN” button. I
needed it to appear smoothly. After some exploration, I made the button a
custom cursor when hovering over the album. This custom cursor also applies
to the artist which navigates users to the About page. The outcome is
displayed in the video below.

|
| Fig. 2.2 Scripts for custom cursor |
Landing Page

|
| Fig. 2.3 Landing page timeline |
3) Album Page
On-load and track animation
The Album page was the most challenging part of the project. First, I
developed the on-load animations such as the sliding-in animations for the
vinyl player, hamburger menu, store button and page number. Next, I created
the tracks reveal and hide animations for each page. Additionally, I
animated the vinyl needle moving onto the vinyl and the vinyl starting to
rotate.
Album page: on-load and tracks animation
Hamburger menu
Moving on, I worked on the hamburger menu to make it toggle on and off,
along with the hover animations for each button. I was able to execute the
exact animations as planned for the hamburger menu.
 |
| Fig. 3.1 Hamburger menu |
Track preview and video player
Initially, I planned for track preview videos to play when hovering over
the track images. However, I encountered issues with the video components.
In Adobe Animate, the video component overlays all other layers, even when
positioned underneath. Additionally, I was unable to apply GSAP scripts to
the video component to create animations. These limitations required
adjustments to my initial design plans.
Initial animation planning in Figma
Without other choices, I looked for alternatives to implement the video
component. I created image hover animations for the track images and added a
“PLAY” button as the custom cursor. When users hover over the track images,
the “PLAY” button appears. Clicking the “PLAY” button causes the
corresponding video to fade in and autoplay. Users can close the video
player by clicking the close button.
Album page: track preview and video player

|
| Fig. 3.2 Album page timeline |
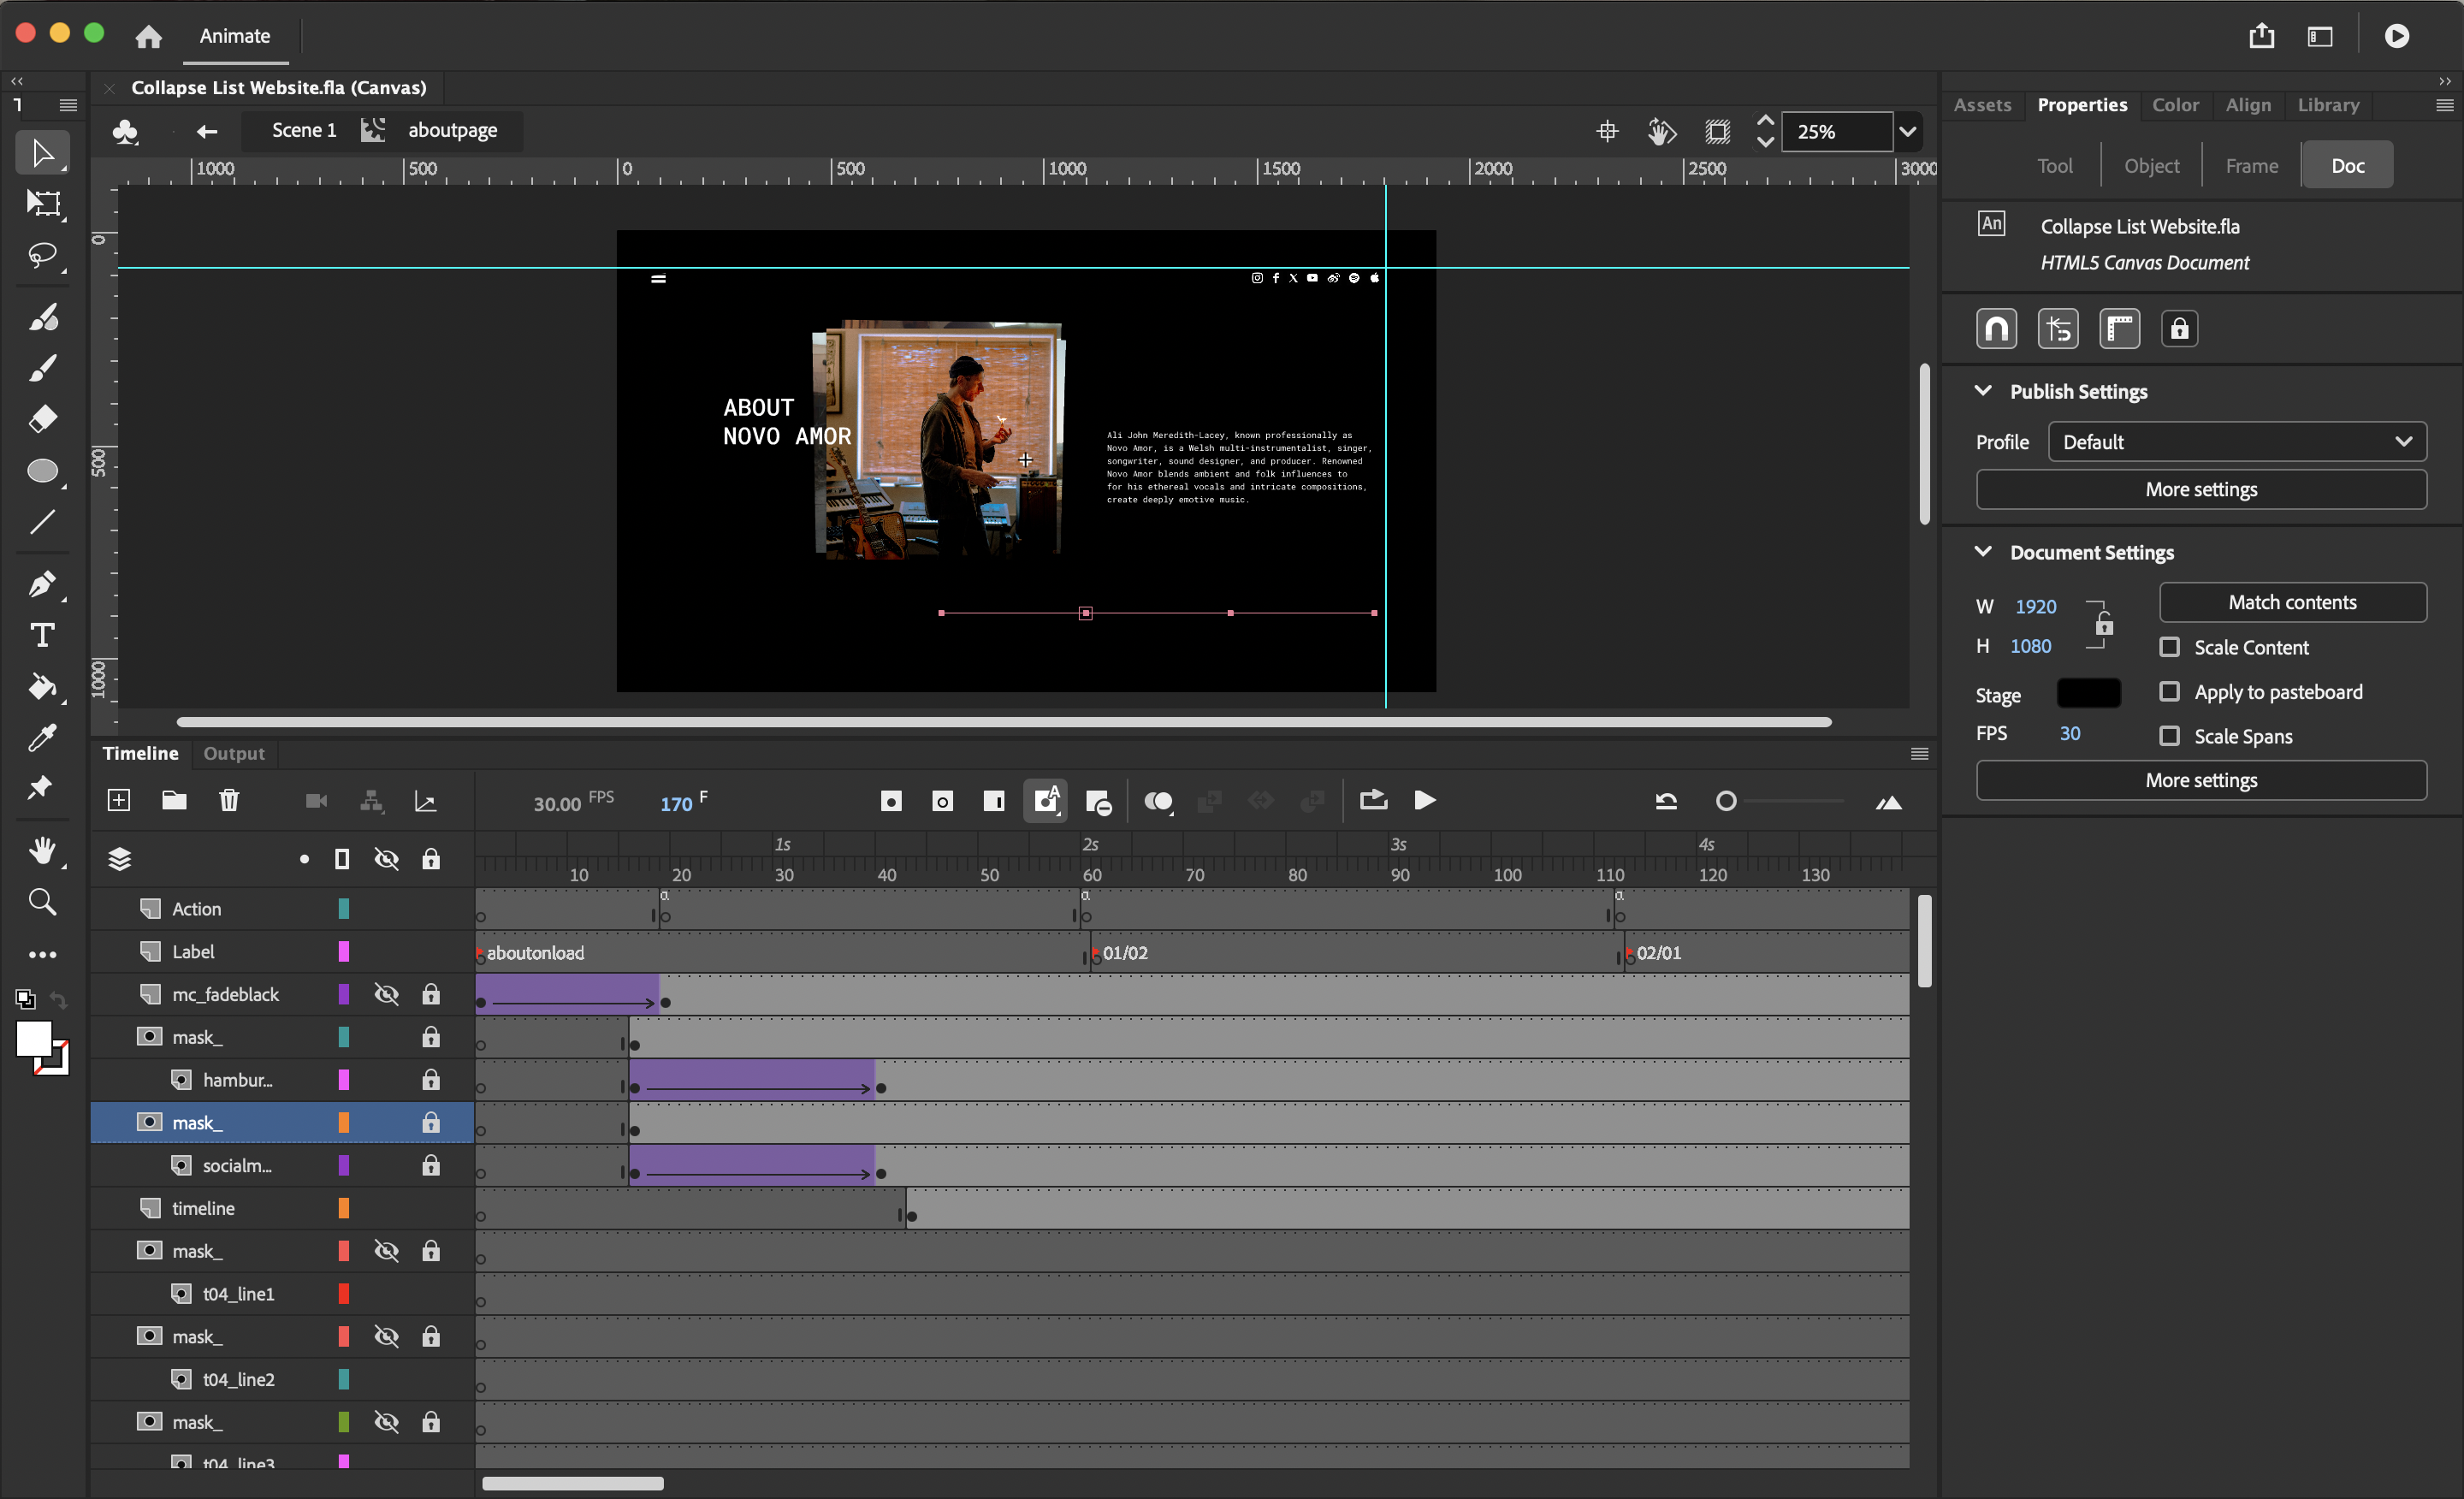
4) About Page
I redesigned and completely changed the layout of the About page because the
initial About page was slightly boring. I revised it and included more dynamic
elements on the page, along with the external links to the artist's social
media accounts.
On the About page, I divided it into four sections: Intro, Early Career,
Creative Evolution and Artistic Vision. I also created a timeline at the
bottom for the navigation to each section.
About page
|
| Fig. 4.1 About page timeline |
5) Page Transitions
I put quite some effort into creating smooth transitions between pages,
incorporating fades, slides, and smart animations.
Page transition between Landing page and Album page
Page transition between Landing page and About page
Page transition between Album page and About page
Website Publish and Upload
After publishing the working files, I uploaded them to Netlify several
times. I thoroughly browsed through the website to ensure there were no
significant issues. Due to time constraints, I left the minor bugs
unresolved and focused on ensuring the functionalities and visuals were
working well.

|
| Fig. 5.0 Uploading to Netlify |
Final Submission
Netlify Link: https://collapselistwebsite.netlify.app/
Google Drive Link: https://drive.google.com/drive/folders/1fm6fsr_WAf-5bEr8mV0f7qn6YsVaifzE?usp=drive_link
Presentation Video
Presentation Video - Final Project: Completed Thematic Interactive Website
Walkthrough Video
Walkthrough Video - Final Project: Completed Thematic Interactive
Website
REFLECTION
Developing this website went smoothly at the beginning, but when it came to scripting and hover animations, I struggled significantly. The process was tedious, requiring extensive testing, and sometimes the preview wouldn’t load, necessitating a restart of Adobe Animate. Despite these challenges, I managed to execute the website with a satisfactory outcome. However, there is still room for improvement, particularly in adding indications for users to identify intractable areas. I also noticed that I spent too much time on this module, which affected the completion of other modules.
Overall, I found that using Adobe Animate to create a website is not overly difficult, but it does require time to understand its functionalities and the concepts of creating animations. Lastly, thanks to Mr Razif who is always willing to help me solve the problems I faced in Adobe Animate.


it turned out quite smooth. not bad
ReplyDelete