Experiential Design - Task 3: Creative Experience Design Project Prototype
10.06.2024 - 08.07.2024 / Week 8 - Week 11
Lim Rui Ying / 0358986Experiential Design / Bachelor of Design (Hons) in Creative Media
Task 3: Creative Experience Design Project Prototype
INSTRUCTIONS
Task 3: Creative Experience Design Project Prototype
We are required to work on the prototype of our proposed idea, focusing on
creating a functional prototype that can test the MVP features.
Task requirements:
- Screen design visual prototype (Figma)
- Functional prototype showcasing the MVP features of the AR app
Things to do:
I listed the key features of my AR app and outlined the tasks to execute and
test in this prototype:
- Create a 3D animal pattern and test it using Ground Plane
2) Confirmation Message
- Ensure the recognition of physical blocks and detection of block placement
3) Interactive virtual animal [Marker-based AR]
- Create physical pattern blocks
- Take images of the completed pattern and use them as image targets for spawning the virtual animals
- Implement and verify interaction features (move, rotate, resize)
- Integrate and test animal sounds and animations


Fig. 1.0 1) AR hint; 2) Confirmation messages; 3) Interactive virtual
animal (sequence starts from left to right)
Prototyping Process
1) AR hint [Markerless AR]
I began by creating the AR hint and testing its ability to spawn on
the Ground Plane. I utilised free 3D models of the pattern blocks
by Taimoor98.
First, I imported the 3D pattern blocks into the project. Next, I
assembled the blocks to create a cat pattern and set it as a child of
the Ground Plane Stage.

|
| Fig. 1.1 Assemble cat pattern |
Moving forward, I added colours to the blocks by creating corresponding materials.

|
| Fig. 1.2 Add materials to the blocks |
Since this AR hint has to be semi-transparent, I changed the material rendering mode to Fade and adjusted the Alpha value.

|
| Fig. 1.3 Adjust the transparency of the blocks |
After completing these steps, I tested the AR hint using the Ground
Plane.
Video 1: Outcome of testing the AR hint using the Ground Plane
2) Confirmation Message
The confirmation message feature is intended to display a message
like "Good job" on the screen when users place a block in the
correct position. After searching online, I found that a possible
method to implement this feature could be using object tracking.
However, I haven't implemented this feature.
3) Interactive virtual animal [Marker-based AR]
To create the physical blocks, I designed the block templates in
Illustrator. After printing them out, I coloured them to match the
pattern block colours. These blocks were then used to assemble
the cat pattern.

|
| Fig. 2.1 Creating block templates in Illustrator |

|
| Fig. 2.2 Colouring the blocks |
Once the blocks were completed, I assembled them to form the cat
pattern.

|
| Fig. 2.3 Final outcome of the physical blocks |
Next, I aimed to use the cat pattern as a target to spawn a
virtual cat. I experimented with two methods: creating image targets
and model targets.
Attempt #1: Image Target (Failed)
For my first attempt, I created an image target for the cat
pattern by taking a photo of the cat pattern on my table.
Obviously, this image target could not work because of the
background.

|
| Fig. 2.4 Image target (attempt #1) |
Attempt #2: Model Target (Failed)
When exploring alternative solutions, I discovered that to use a 3D
object as a target, I need to create a model target for it to spawn
the AR content.
I made a 3D model of the cat pattern and uploaded it to the Model
Target Generator. After configuring the model target settings, I
downloaded the database and imported it into my project. However, I
failed to spawn the virtual cat when scanning the physical cat
pattern because I was unfamiliar with the necessary steps and
requirements for creating a highly recognisable model target.

|
| Fig. 2.5 Creating a 3D model of the cat pattern in Blender |

|
| Fig. 2.6 Import the 3D model into Model Target Generator |

|
| Fig. 2.7 Model target attempts |
Attempt #3: Recreate Image Target
I recreated a new image target by taking a photo of the cat pattern
against a white background. I attempted to upload an image target with
a transparent background, but Vuforia indicated that the image had the
wrong colour model.

|
| Fig. 2.8 Unable to upload the image target (wrong colour model) |

|
| Fig. 2.9 Recreated image target (attempt #3) |
Video 2: Outcome of testing the recreated image target
4) Screens
After I had done the AR features, I started developing the screens in
Unity including the button navigation and manual guide screens.
For now, I have developed four scenes in my project, including Start
Screen, Animal Pattern Selection, Place AR Hint and Spawn Virtual
Animal.

|
| Fig. 3.1 Scenes created |

|
| Fig. 3.2 Start screen |
|
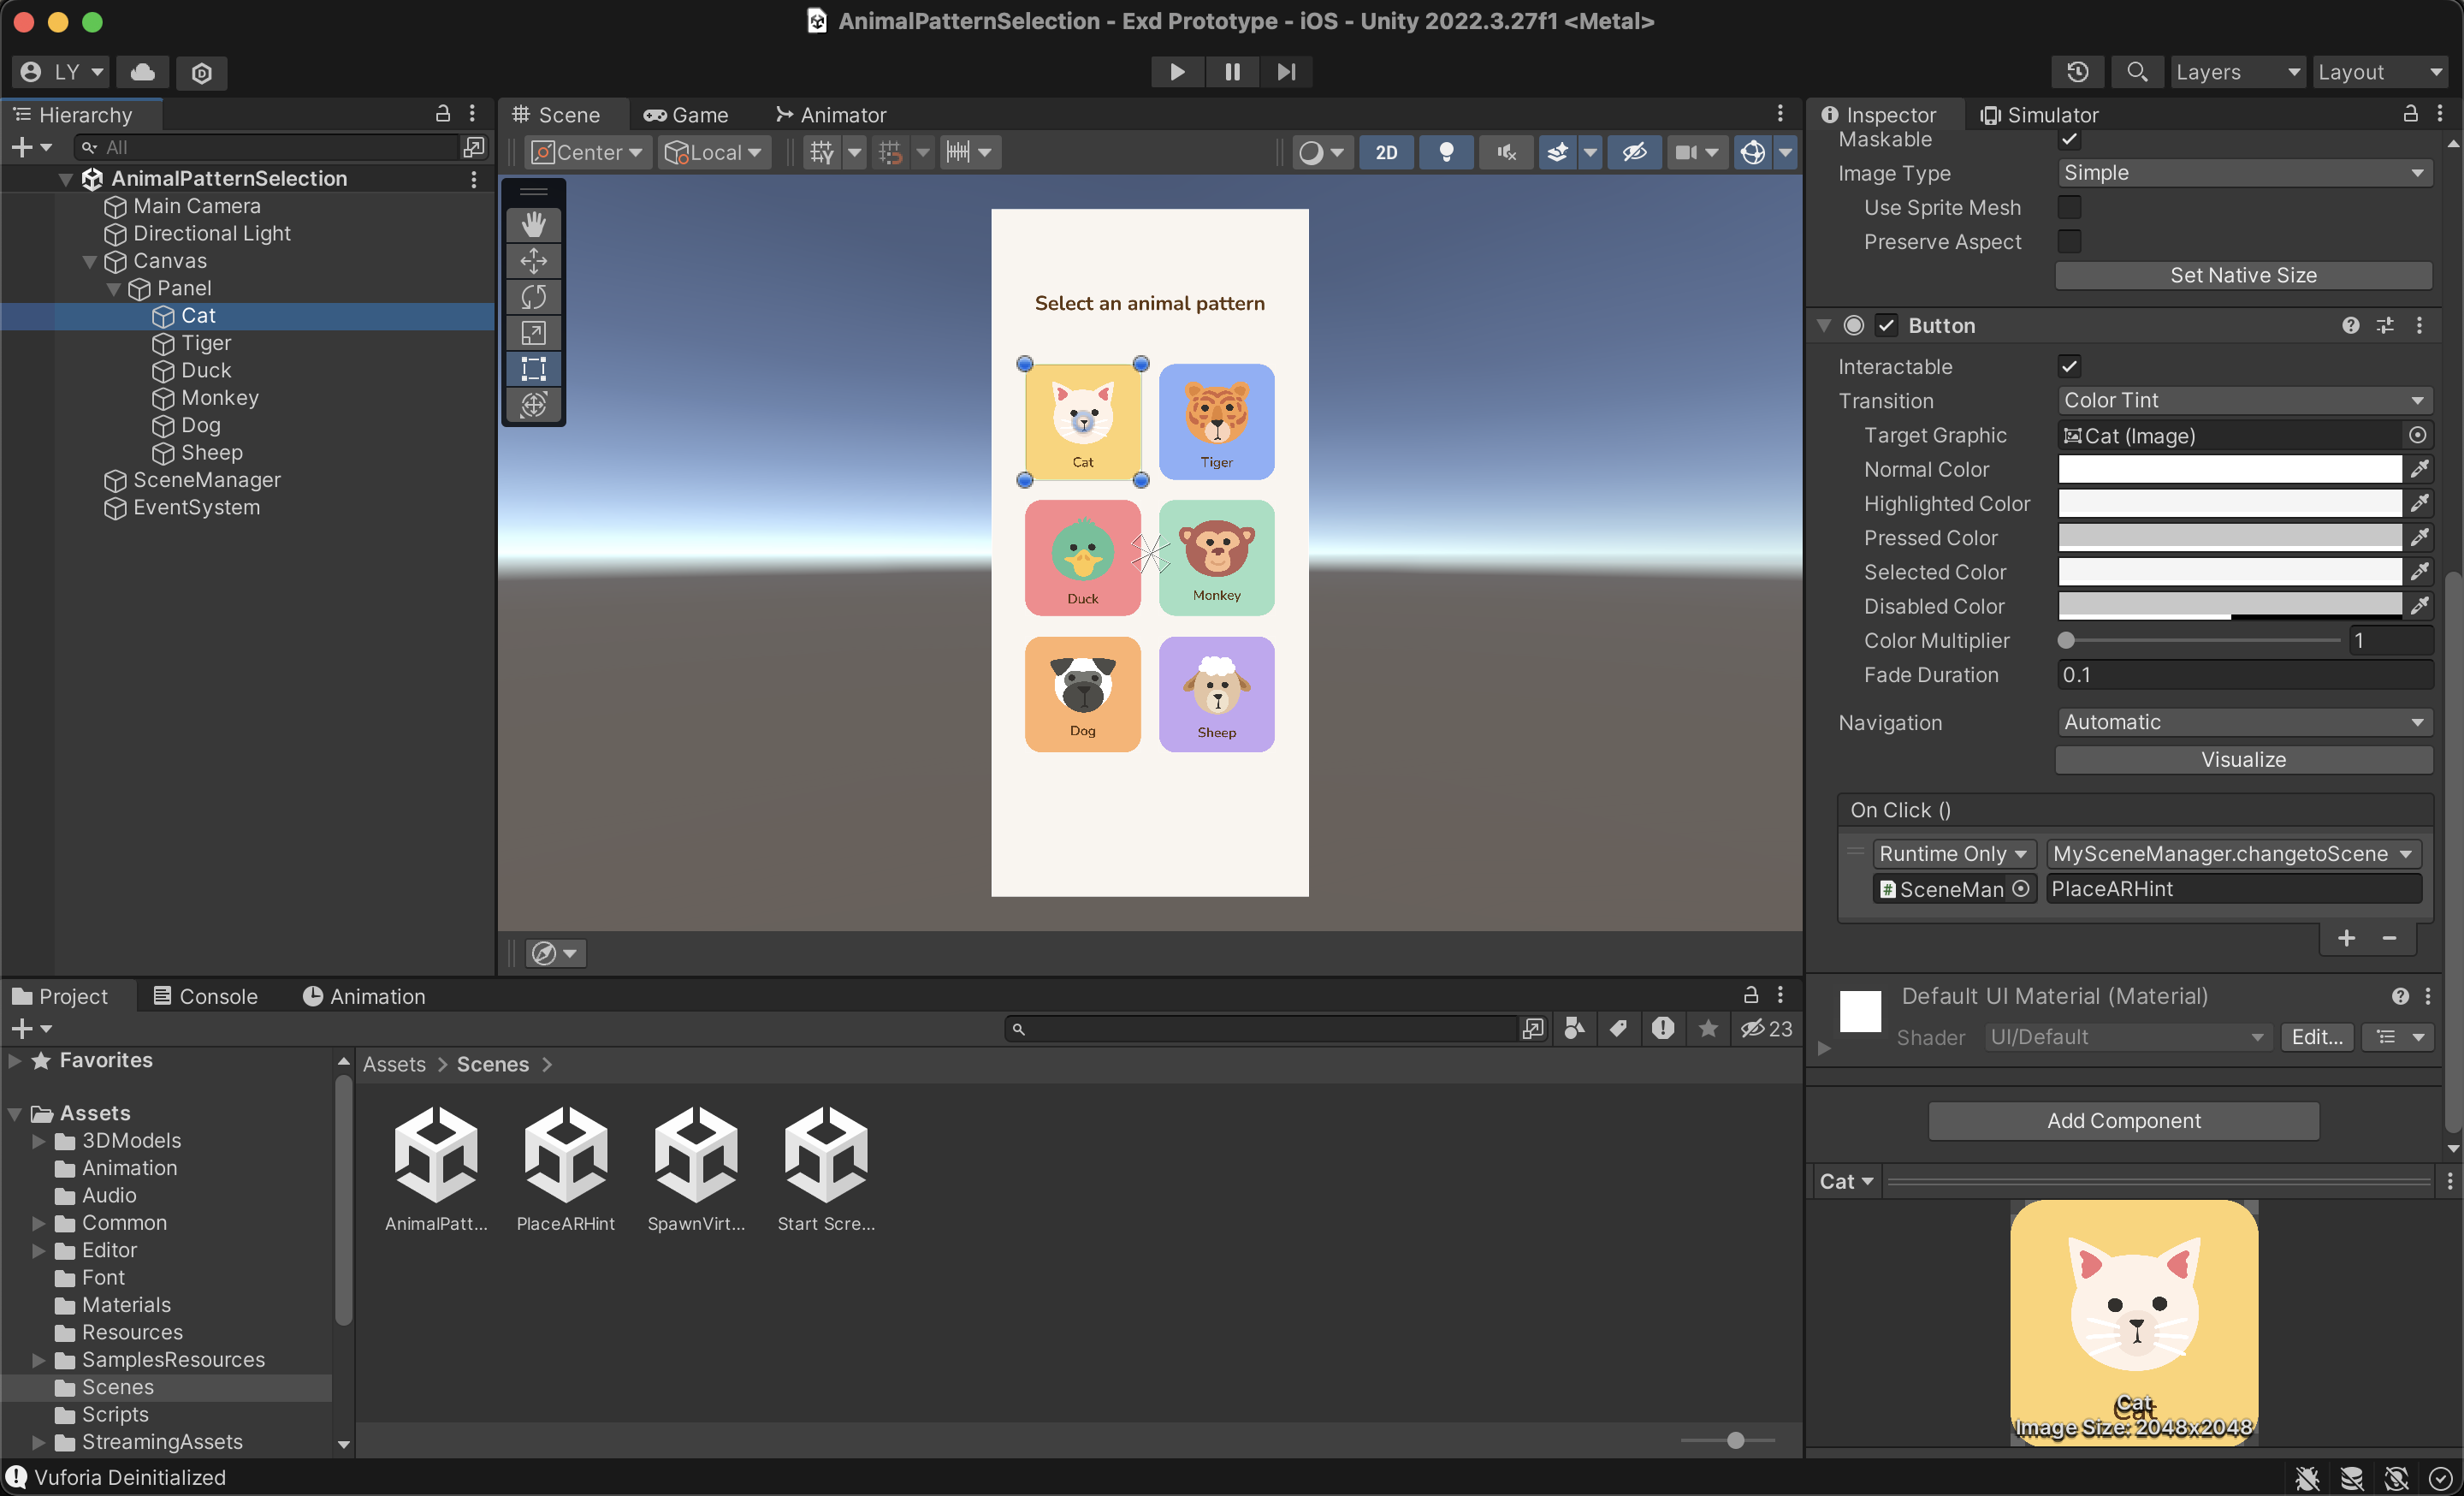
|
Fig. 3.3 Animal pattern selection |

|
|
Fig. 3.4 Scan flat surface guide |

|
| Fig. 3.5 Scan completed pattern guide |
Video 3: Create scan icon animation

|
|
Fig. 3.6 Animal description panel |
Walkthrough Video
Animal Blocks AR Walkthrough Video - Task 3: Creative Experience
Design Project Prototype
Presentation Video
Presentation Video - Task 3: Creative Experience
Design Project Prototype
Summary
Completed:
- Place AR hint
- Spawn virtual animal
- Manual guide (scan flat surface, scan completed blocks)
- Animal descriptions and sounds
To be done:
- Implement object tracking for the confirmation message feature
- Develop AR hints and virtual animals for the remaining animal patterns
- Add rotate and resize functions
FEEDBACK
WEEK 11
The background for the image target has to be white.
REFLECTION
In this prototype, I only implemented two AR features that involve markerless AR and marker-based AR. Both features are covered in classes and are straightforward to implement. However, I have no idea how to implement the confirmation message feature, which is important for the app. Due to time constraints from working on my game prototype for another module, I could not fully showcase the pattern block assembly process using the AR app. Moving forward, I will focus on finding a solution for the confirmation message feature to create a smoother flow and more engaging experience for users.


Comments
Post a Comment